
Last week I installed four new SAN switches at a customer’s datacenter. Today I would like to show you how I performed a firmware upgrade on that SAN switches running FabricOS using the CLI and the stuff I had to consider. In my scenario the switches came with a very old firmware (version 8.2.1c of FabricOS), thus I had to upgrade the firmware before the switches went operational.
In the meantime Broadcom released a new version 9.1.1b which finally got rid of using Java to manage the switches. However, before upgrading the switches you have to fulfill some requirements.
Before I started the upgrade I did some things for preparation.
- I determined the running firmware version as a starting point
- I read the so-called “Brocade Target Path”.
- I identified the versions needed to reach the desired version
- I checked that all switches have an active support contract, which allows to upgrade the firmware
First of all I considered the upgrade path I want to achieve the final version. For this reason I took a look at the document called “Fabric OS Target Path”. This document is provided by Broadcom and is updated regularly. It builds up a good basis to perform the upgrade. So don’t miss it.
As shown in the screenshot below I realized that the version installed was released in 2019 and was already retired.
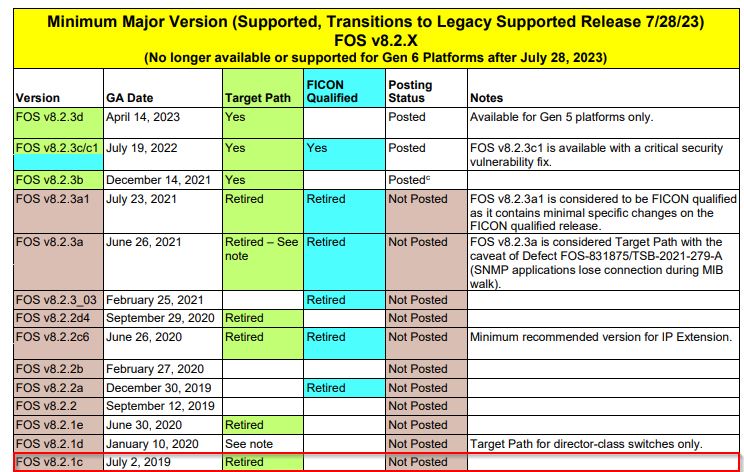
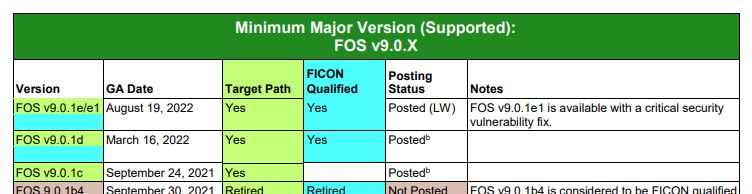
To reach to the desired final – version 9.1.1b in my case – you have to choose the next step in the upgrade path. I recommend to choose a version 9.0.x (9.0.1c, 9.0.1d or 9.0.1e/e1) listed as a target path.
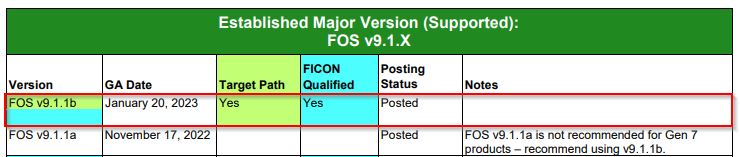
Now it is only one further step away to reach the final version 9.1.1b. Take a look at the next screenshot. Yes, we’ve reached the desired final version of FabricOS.
This is a good point for a first recap of the things I’ve done to prepare the upgrade.
- Determine the running firmware version as starting point
- Read the so-called “Brocade Target Path”. A support document provided by Broadcom
- Identify the versions needed to reach the desired version
Since all preparations are I had to obtain the firmware versions from the switch vendor. My switches were labeled by Lenovo. But for all vendors same rules apply to download firmware versions. First it’s a good idea to have at least one switch registered at the vendor’s support website and second thing is an active support contract.
My starting point to download firmware versions is the data center support website at Lenovo. All my switches were registered in an account and I have the credentials handy. After login to my account I selected one of my SAN switches which take me product support page.
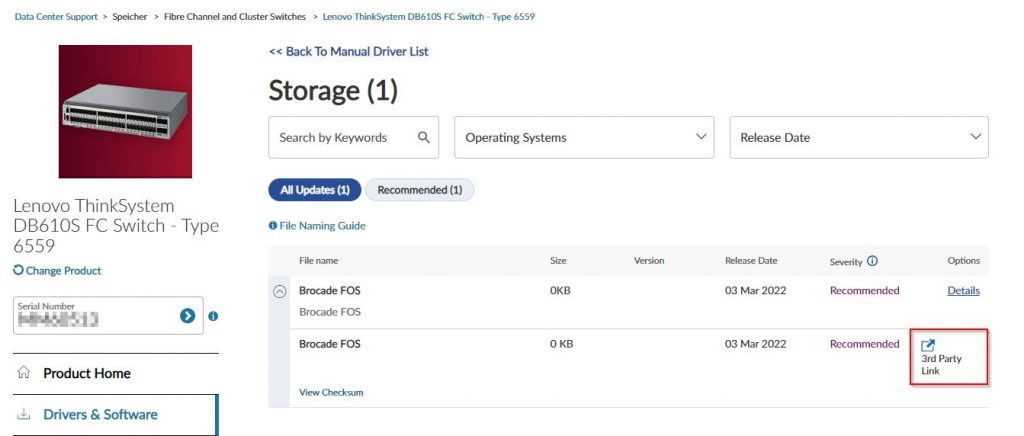
Okay! Take note that it is not possible to download from Lenovo website. For some time now, it has only been possible to download the firmware directly from Broadcom. After clicking the link “3rd Party Link” I was redirected to the Broadcom Assist Portal.
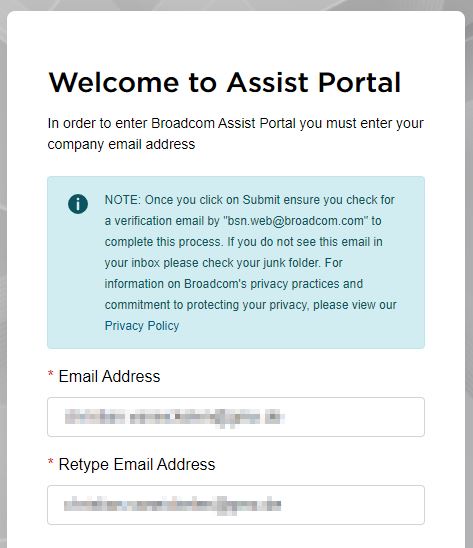
I already used the portal several times. But using it for the you have to provide some information. Which is why I can’t provide a screenshot of this step. Afterwards you are forwarded to the ‘Assist Portal Download Screen’. I entered the serial number of the switch.
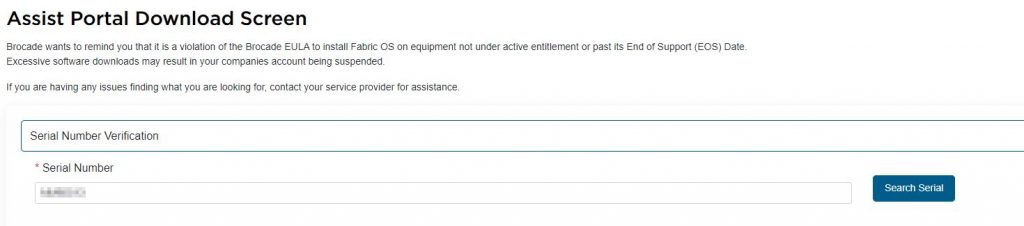
In the lower part all available firmware versions were shown.
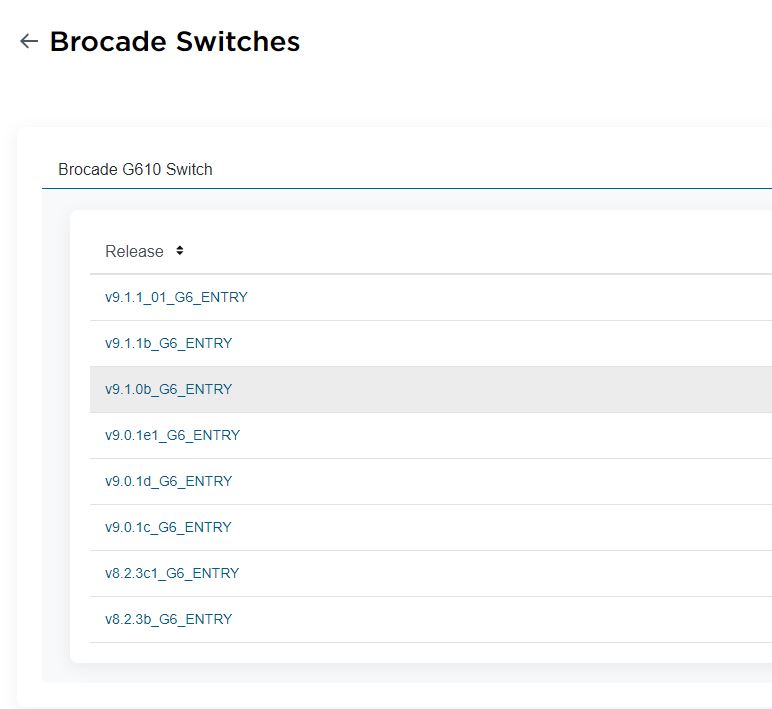
I chose version 9.0.1e1 because I needed that version in my upgrade path. The screen shows a bunch of files available for download. Since I work with a Windows machine I decided to download the Zip-file which contains the firmware.
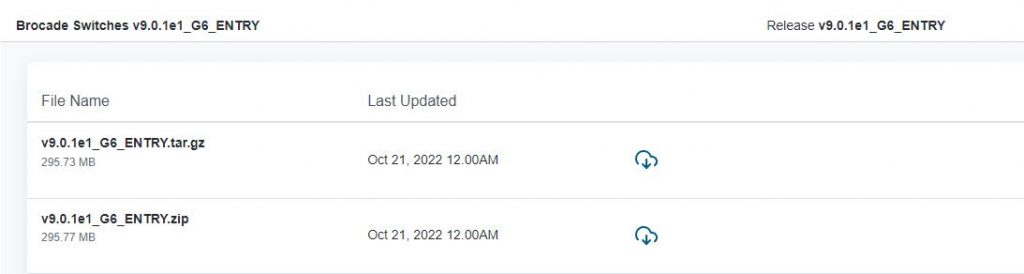
I clicked on the little cloud to download and agree to the license agreement … Caution, instead of downloading the firmware I only send a request. Until the request is approved I was not able to download. Based on my experiences the approval can take up to 24 hours, but this I received the approval after four hours. I came to the portal and was able to download all the stuff I needed.
Yes! Now, I’m ready to upgrade. To download the firmware to the switch I used a SFTP server. I have good experience with the software from SolarWinds. At this point I will not go into detail about how to install the software. 😉
After installing the SFTP Server I configured it like shown in the screenshot. Under ‘General’ I selected the folder where my downloaded and unzipped firmware was located. All other settings I left in the default.
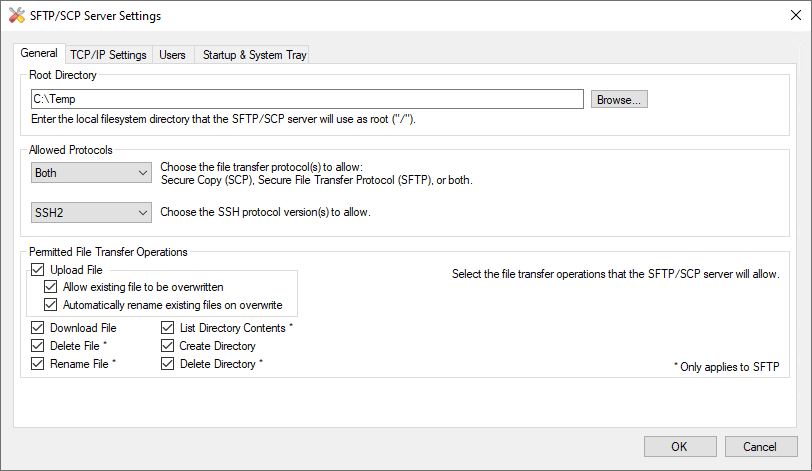
TCP/IP Settings: Based on my experience it is a good idea to bind the listener on a dedicated network interface and to change the port might be helpful as well. In my scenario I changed it to port 9999. I also switched the IP address configuration to ‘Use custom IP address binding’, removed the default entries and added the address of my ethernet interface afterwards.
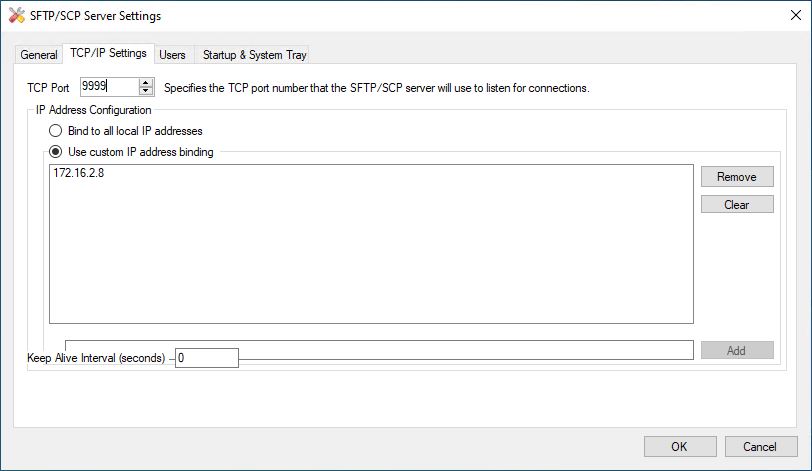
Users: It is necessary to create a user with a password to connect to the SFTP server from the SAN switch. I named it ‘upgrade’.
Now I was really ready for the upgrade. 😉 I connected to my SAN switch using PuttY.
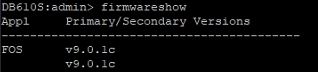
After logging in at the command prompt I typed the following command:
firmwareshowUsing this command I double-checked the running firmware version again. The output should look like this:
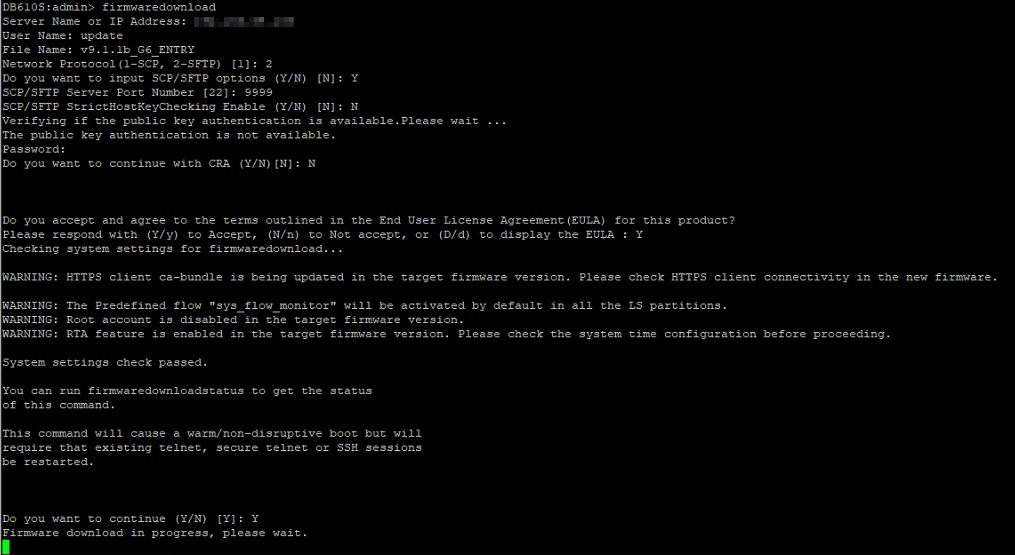
The next command was:
firmwaredownloadstatusThis command ensures that no other upgrade process is still in progress and you can issue this command during the upgrade process to keep you updated.
It the ‘firmwaredownloadstatus’ command shows no other upgrade processes running. So, I was good to go to issue the next command:
firmwaredownloadIssueing the command without any parameters will lead into requesting all necessary values. I provided the IP address my SFTP server, followed by the user I created and the folder where my firmware files were located. The firmware has to be in the top-level of that folder. I answered the question to configure SCP/SFTP options with ‘Yes’ to configure the changed listening port of my SFTP server. After that I provide the credentials and accept the EULA.
I hope this article was helpful during your upgrade process. Happy upgrading! 🙂